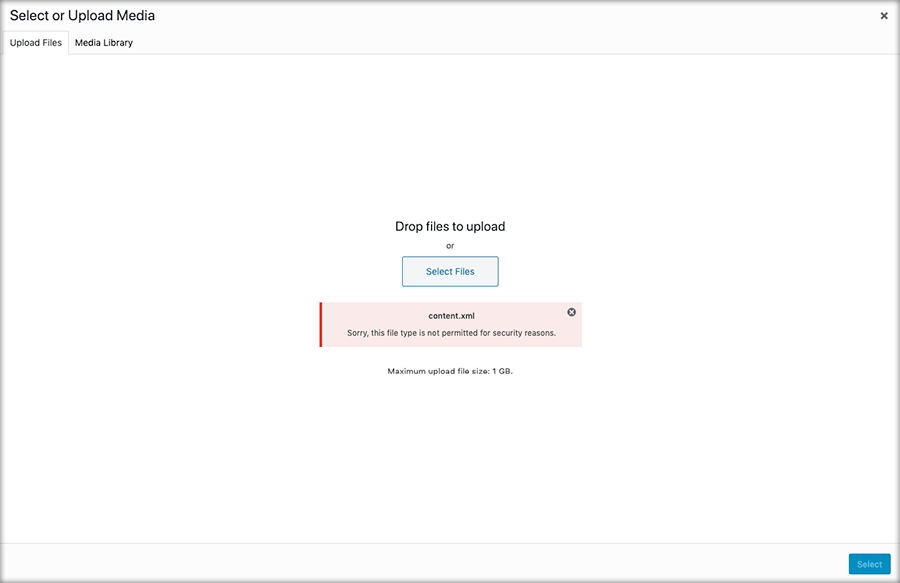
As the demand for easy to use and secure website framework peaked around the world, the use of WordPress as the preferred content management system also skyrocketed. Part of the reason is the open-source nature of WordPress, which means that any security holes are actively fixed by the community. Moreover, the best practice applied when WordPress is developed allows it to be as secure as possible.
Various plugins also enable site administrators to extend the security features of WordPress, such as by restricting logins to specific IP addresses or implementing CAPTCHAs on every user interaction. However, with security also comes some inconvenience. By default, WordPress severely restricts the file types that you can upload through it. Understandably, the restriction is in place to avoid malicious users uploading files that can harm the website system. However, if you need to upload an unsupported file in a pinch without access to FTP/SSH, the restriction could prove frustrating.
Default Supported File Types in WordPress
To recap, WordPress itself supports a wide range of file type for uploads. You can upload images in JPG, JPEG, PNG, GIF, and ICO format, as well as office documents in PDF, DOC, DOCX, PPT, PPTX, PPS, PPSX, ODT, XLS, XLSX, and PSD. For multimedia websites, WordPress allows uploading of MP3, M4A, OGG, and WAV audio, as well as MP4, M4V, MOV, WMV, MPG, OGV, 3GP, and 3G2 video.
Internally, WordPress uses something called MIME (Multipurpose Internet Mail Extension) to filter the uploaded files, so that users can’t spoof the file extension to upload malicious files. Fortunately, if you need to upload files, not in the extension whitelist, you can do it with some efforts.
On Multisite Installation
If you have a WordPress network/multisite install, your job will be much easier. As a network admin, you have full control of allowed file types to upload to your website. To check whether your website is a network/multisite install, you can try to find the Network admin link after logging in as an admin.
If you can access the multisite admin, you can continue. Once in the multisite admin configuration page, click “Settings”, followed by “Network settings”. Then, you can find the “Upload file types” option, which could be used to allow files normally not allowed to be uploaded. Simply enter the file extension of the file you want to upload and click “Save”. Once saved, you and your users can upload the file with the extension you specify.
For Single Site Installation
However, if your WordPress installation is not a network/multisite one, you can use various plugins to achieve the same target. One of the most capable plugins is Enhanced Media Library, which you can use for free. To use Enhanced Media Library, visit the Add Plugins screen by clicking Plugins > Add Plugins.
Type Enhanced Media Library, then click “Install”. Wait for the installation process to finish (it should only take a few seconds), and click “Activate”. Once the Enhanced Media Library plugin is activated, you can see a “MIME Types” submenu in the Settings menu. Click the menu, and you will be able to enable or disable specific file extensions or MIME types for uploads.
You can also add new MIME types/file extensions to the upload whitelist by clicking “Add New MIME Type” at the top of the page. On the form that appears, enter your desired MIME type and file extension.
If there is no need for users to upload a file, not in the whitelist, you can upload the file through plugins that interface with the WordPress admin panel.
One of the excellent choices is Advanced File Manager plugin, which has a more than 40,000 install base and compatible with the latest version of WordPress. To start using the plugin, all you need to do is to install it through the Add Plugin screen. In the File Manager screen, you will see the file system of WordPress, fully exposed.
To upload a file, just click “Upload” and choose the files you want to upload. Ideally, you will want to store the uploaded file to “wp-content/upload/(year)/(month)” to make your WordPress installation less messy; however, you can upload the file anywhere you wish. After uploading, you can directly link the file to your post/page.
Most of the time, the upload needs of a typical WordPress user could be satisfied by following one of the aforementioned steps. However, if you need unrestricted uploads, you can edit the wp-config.php, the core configuration file of WordPress.
Be aware, though, this method will allow anyone to upload any type of files to your website, so proceed with caution. To edit wp-config.php and allow unfiltered uploads, grab your favorite FTP client and connect to your site through FTP. Download wp-config.php from your site, and open it with a text editor such as Notepad. Add the following code to the file: define('ALLOW_UNFILTERED_UPLOADS', true); and save the file. After saving the file, upload it back to the server.
2,967 total views, 1 views today
